
Simple Ultimate Guide To Cold Process Soap Recipe in 2025

When I first tried the Cold-Process Soap Recipe, it was super fun to make. I like making soap at home using the cold-process soap recipe because I can create my own personal soap with my favorite ingredients and fragrances. And trust me, it feels very exciting to use your own cold-process soap recipe.
Actually, the Cold Process Soap Recipe is one of the simple soap recipes with simple ingredients and basic steps. Anyone can make soap that is as good as the expensive or luxurious stuff.
Today, I will guide you through everything about making your own cold process soap. It’s perfect for beginners or those who want to get better at soap-making. You will learn how to make beautiful, personal soaps.
Understanding Cold Process Soapmaking Basics
I think that making soap is like a mixture of science and art. At its core is saponification, a chemical reaction that turns simple ingredients into luxurious soap bars.
Saponification is when lye solution is mixed with oil, creating soap through a cold reaction We can say that when lye (sodium hydroxide) solution is mixed with oils or fats, the chemical reaction that occurs is called saponification. After this, the mixture cools down and takes the form of a hard bar, which is why it’s called the “cold process”.
What Makes the Cold Process Soap Recipe Special
- Creates soap through a precise chemical reaction
- Allows complete control over ingredient selection
- Produces gentler, more customized soap bars
If you are an absolute beginner looking for a simpler recipe or want to make soap with fewer ingredients, Angela Palmer’s guide is a great place to start. She has shared a simple two-oil soap recipe. And if you have some experience or are interested in creating layered soaps, check out Conscious by Chloé’s tutorial.
Benefits of the Cold Process Method
- Maintains natural glycerin content
- Enables unique ingredient combinations
- Produces long-lasting, high-quality bars
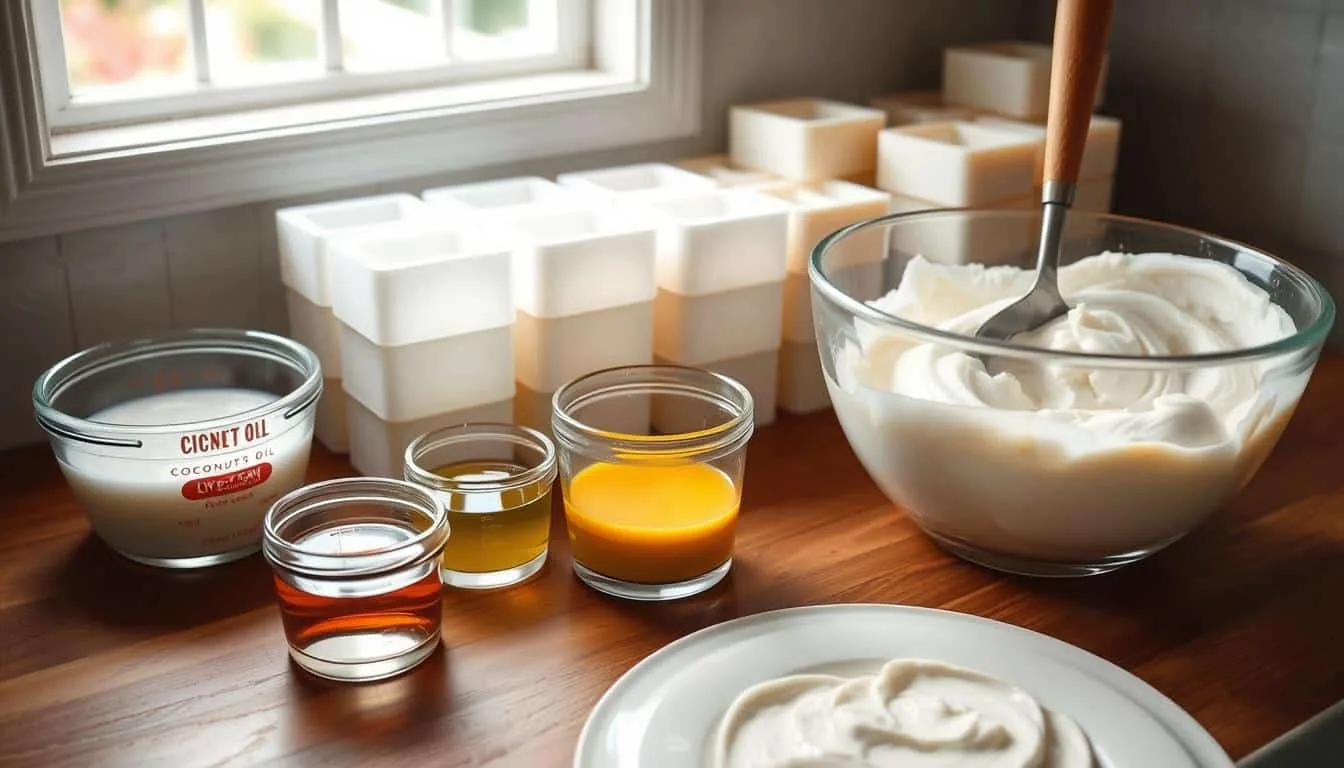
Equipment and Tools
Before we start, there is some essential equipment needed for cold process soap making. I’ll show you the key equipment for making your own best soap.
- Digital Kitchen Scale:
- Thermometer
- Immersion Blender
- Safety Gear
Picking soap molds, you have many options. Some are below:
In addition, by following the cold process soap recipe, you can ensure that your soap retains the beneficial properties of the natural oils you choose to use.
- Silicone Loaf Molds: Flexible and easy to use
- Wooden Soap Molds: Traditional and Aesthetically Pleasing
- Plastic Containers: Budget-friendly alternative
I suggest that you pick a mold whose materials are non-reactive and easy to clean. Stainless steel and heavy-duty plastic are best for your soap-making toolkit.
| Equipment | Purpose | Recommended Material |
|---|---|---|
| Mixing Containers | Lye and Oil Preparation | Stainless Steel, Glass |
| Soap Molds | Forming Soap Bars | Silicone, Wood, Non-Reactive Plastic |
| Cutting Tool | Portioning Soap Bars | Large Sharp Knife or Wire Cutter |
Choosing the right oils and ingredients in your cold-process soap recipe is crucial for achieving the desired texture and benefits of your final product.
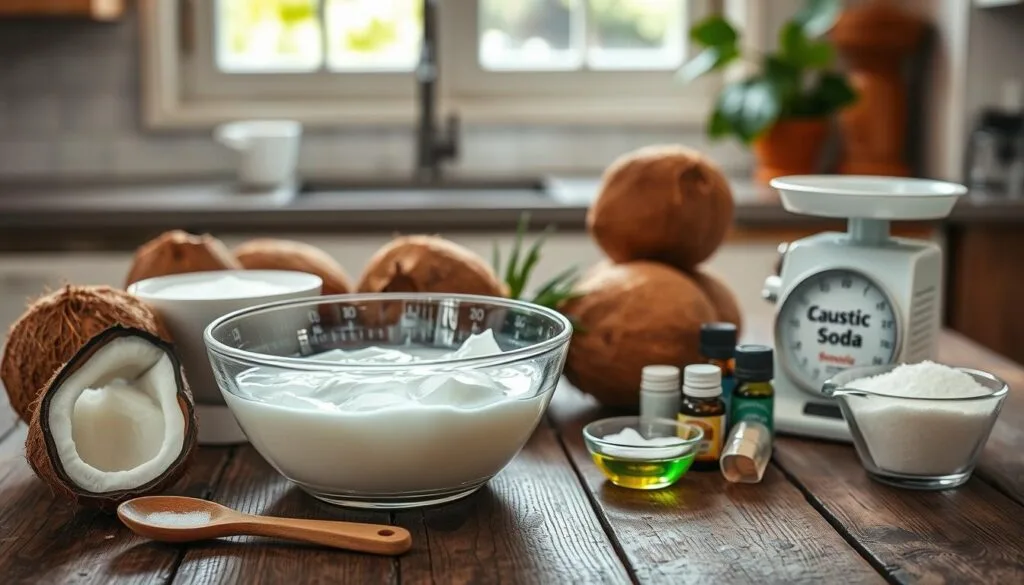
Ingredients for Your Soap
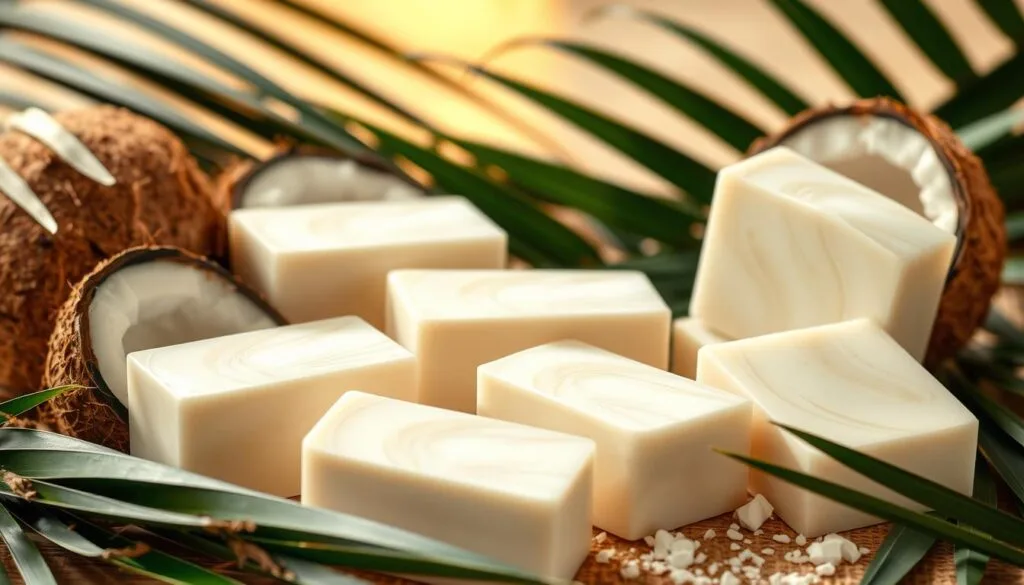
This soap recipe contains olive oil to moisturize and gently condition of skin, with coconut oil is used for a hard bar and has strong cleansing properties. We are using Palm oil to make our soaps hard and have a creamy texture. As we know already, lye (sodium hydroxide) reacts with the oils in the saponification process, while distilled water dissolves the lye to help this chemical reaction and make a smooth and balanced soap bar.
Lye is a base of these processes. We can also make different soap recipes using lye, such as Lye Soap, Olive Oil Soap, Palm Oil Soap, and last but ot least, Coconut Oil Soap, using different methods, ingredients, and fragrances.
| Ingredient | Weight (grams) |
|---|---|
| Distilled Water | 74.73 g |
| Sodium Hydroxide (Lye) | 25.98 g |
| Olive Oil | 99.64 g |
| Coconut Oil | 62.28 g |
| Palm Oil | 37.37 g |
Understanding Oil Properties
When we pick ingredients for soap, we must know the ingredients’ properties and uses. Each ingredient is used for a different purpose in soap, especially oils.
| Ingredient | Purpose in Soap |
|---|---|
| Coconut Oil | Makes the soap hard and cleans well |
| Shea Butter | Moisturizes and conditions |
| Olive Oil | Gently conditions |
| Castor Oil | Boosts lather and makes bubbles stable |

Safety Precautions When Working with Lye
I remember that 4 years ago, when I was a beginner at soap making, I did not use protective gear because I thought I didn’t need it, but I was wrong. I got lots of burns because of that attitude of mine. Working with lye solution needs careful attention. Safety is very important in soapmaking, especially in cold process soap recipes and hot process soap recipes. Always wear protective gear.⛑️⛑️
- Nitrile gloves (better than latex)
- Fully sealed protective goggles
- Long-sleeved clothing
- Long pants
- Closed-toe shoes
- Respiratory mask
Note: Always remember, while making your lye solution, always add lye to water, never the reverse. This trick helps avoid dangerous reactions and splashes. (Thanks to me later 👍)
| Safety Recommendation | Purpose |
|---|---|
| Work in well-ventilated area | Minimize lye fume exposure |
| Work in a well-ventilated area | Ensure precise measurements |
| Use a digital scale | Immediate response to potential contact |
Use high-quality sodium hydroxide with 98% purity. Always check the Safety Data Sheet before use. By doing this, you’ll make soap safely and with confidence.
Temperature Considerations
Temperature is very important in soap making. The best mix temperature is 100-110°F. Use a good thermometer to check it. If the temperature is perfect for the lye solution, it will have a smooth saponification process.
| Ingredient | Recommended Temperature |
|---|---|
| Oils | 100-110°F |
| Lye Solution | 100-110°F |
Step-by-Step Mixing Process
Making soap with the cold process method needs precision and attention to detail. I’ll guide you through the mixing steps. These steps turn your ingredients into beautiful handmade soap.
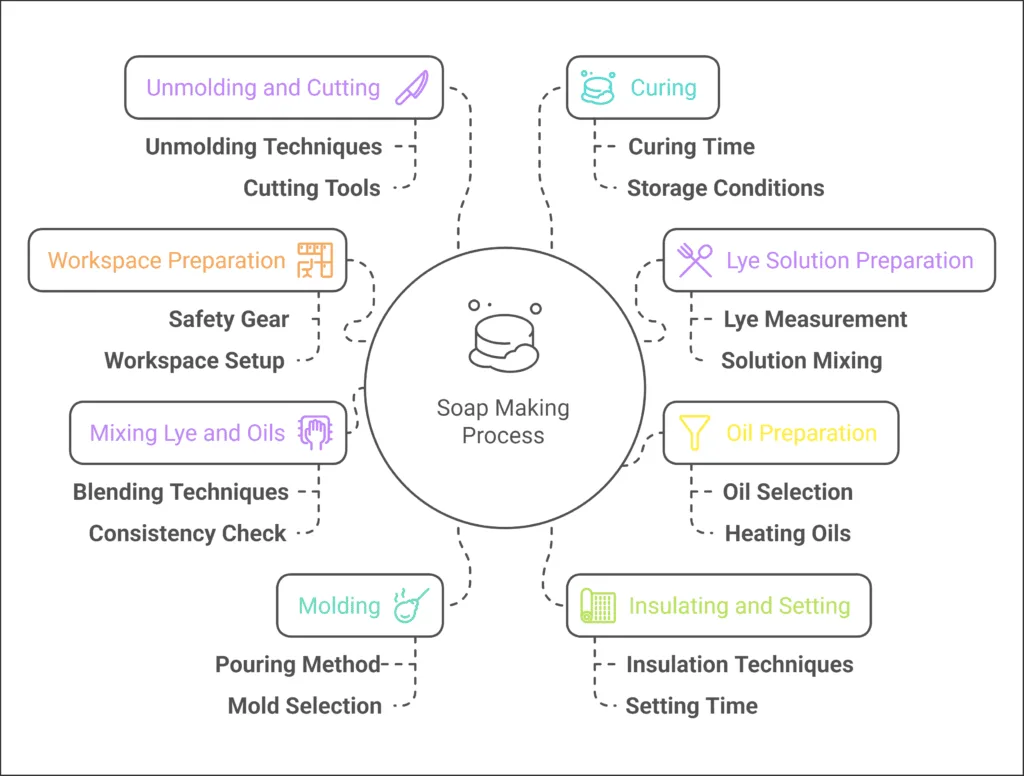
Step 1: Prepare the Workspace and Safety Gear
Before starting the process, I need you to wear gloves, goggles, and protective clothing and also make sure that your work space is clean and well-ventilated.
Step 2: Prepare the Lye Solution
Carefully measure 25.98 g of sodium hydroxide (lye) and 74.73 g of distilled water. In a heat-resistant container, carefully add your lye solution to water, never the reverse. This trick helps avoid dangerous reactions and splashes. Then, stir gently until the lye dissolves in the water. The solution will become hot, so set it aside to cool to about 100°F (38°C).
Step 3: Prepare the Oils
Now is the time to prepare the oil. Carefully measure 99.64 g of olive oil, 62.28 g of coconut oil, and 37.37 g of palm oil. Now, take a large heat-resistant bowl and mix the oils. Now Heat gently (either in a double boiler or microwave) until fully melted. It will usually take 3-5 minutes for the oils to fully melt, depending on the heat and quantity of oils. Once the oils are melted, allow them to cool to around 100°F (38°C) before combining them with the lye solution.
Step 4: Mixing the Lye and Oils
Now, all heating processes are done. As we know from Step 2, we have prepared a lye solution,n which is around 100°F (38°C), and the same oils mixture, which is also around 100°F (38°C). Now, slowly pour the lye solution into the oils. You can use a stick blender to blend the mixture. Use the blender on and off while using the blender in between to check the texture. The mixture should begin to thicken after a few minutes.
Blend the soap mixture until it reaches trace, which is when it thickens and leaves a visible mark on the surface when dripped. This process usually takes 5-15 minutes, depending on the speed of your stick blender and the temperature of the oils and lye.
Step 5: Mixing the Lye and Oils
Now, here comes one of the most satisfying steps in the whole soap-making process: pouring the mixture into the soap mold. After pouring all the mixture into the mold, tap the mold gently to remove air bubbles and smooth the top.
When choosing soap molds, consider these key factors:
- Material durability
- Size and shape flexibility
- Ease of soap removal
I prefer Silicone molds because they are heat-resistant and versatile. They can handle temperatures between 175-200°F during the hot process method. They also release soap bars easily without damage.
Step 6: Insulate and Let the Soap Set
Once you have poured the soap into the mold, cover it with a towel or blanket to keep it warm. This helps the soap to harden properly. Let the soap set for 24-48 hours to be hard enough to unmold.
Step 7: Unmold and Cut the Soap
After 24-48 hours, remove the soap from the mold. If the soap feels too soft, give it a bit more time to firm up. Once unmolded, carefully cut the soap into bars using a sharp knife or soap cutter. Please be careful with your fingers when cutting. I have seen people cut their fingers during this step.
Step 9: Curing
Once your soap is cut into bars it is time for curing. Place the bars on a rack or tray in a cool or dry area with plenty of airflow to make them dry out and harden. Cure for 4-6 weeks. This process ensures that the soap becomes milder, harder, and longer-lasting, giving you the best possible results. Patience is key to having a high-quality, luxurious bar of soap!
Tips For Making Perfect Soap
Everyone can learn how to make the cold process soap recipe with practice and patience, leading to the best, most beautiful, and elegant soap.
Here are some key tips for making your perfect soap:
The cold process soap recipe not only gives satisfaction but also leads to high-quality soap that you can enjoy or gift to others.
- Invest in precise digital scales for accurate measurements
- Always wear protective gear like gloves and safety glasses
- Maintain consistent temperatures between 95-100°F for best results
- Use a reliable thermometer to check oil and lye solution temperatures
Each time you follow the cold process soap recipe, you build your skills and confidence in soap making, which is an incredibly rewarding experience.
The cold process soap is so all-around that the recipe allows you to create various types of soap that cater to specific skin needs.
Patience is key in soap making. Don’t rush the process. Let your soap cure for 28 days. This ensures the best quality bars with great hardness and skin benefits.
Optimal Storage Conditions
Making cold process soap can be safe and fun, especially when you understand the process and take the necessary precautions outlined in your cold process soap recipe.
- Store soap in a cool, dry place
- Ensure full air circulation
- Avoid direct sunlight and heat sources
- Use well-ventilated storage like wire racks
Shelf Life Considerations
| Soap Type | Typical Shelf Life | Storage Recommendations |
|---|---|---|
| Basic Oil Soap | 1-2 years | Cool, dry area with air circulation |
| Fancy Oil Soap | 6-12 months | Avoid humidity, use dehumidifier if needed |
Conclusion
Making soap with the cold process method is a fun experience! I always have fun making soap while listening to music. Making soap using the cold process method is very easy; you just need to carefully measure your ingredients, mix lye and oils at the right temperatures, and blend to trace. After pouring the soap into the mold, it will set beautifully. and let it rest for 4-6 weeks for a better quality of soap.
You can name this recipe as you like because we have used different types of ingredients to make this beautiful soap. You can call it a lye soap recipe, olive oil soap recipe, palm oil soap recipe, or coconut oil soap recipe because we have used them all in the cold process soap recipe.
If you are not able to make the soap that you were expecting, do not get demotivated; every batch is a chance to learn. Don’t worry about mistakes at first. With time, you will get better at making it perfect.
FAQ
What is cold process soap making?
Cold process soap making is a traditional way to make soap. It involves mixing oils with a lye solution. This mixture reacts to create soap without using heat.
Is it safe to make soap with lye?
By using the cold process soap recipe, you’ll gain skills and knowledge that enhance your soap-making experience.
Yes, it’s safe if you follow safety steps. Wear goggles and gloves, work in fresh air, and always add lye to water. This prevents dangerous reactions.
Homemade soap made from the cold process soap recipe will typically last longer than commercial soaps due to the natural ingredients used.
How long does it take to cure cold-process soap?
Cold process soap needs 4-6 weeks to cure. This time, let the soap harden and become milder. It’s important for good soap quality.
Can I add fragrances to my homemade soap?
Yes! Use essential or fragrance oils for scent. But, make sure they’re safe for soap and use the right amount. Some essential oils work better than others.
What equipment do I need to start making cold process soap?
You’ll need a digital scale, thermometer, and immersion blender. Also, stainless steel or plastic bowls, molds, goggles, gloves, and protective clothes. A lye calculator is also recommended.
How do I know when my soap has reached trace?
Trace is when the soap thickens and shows a pattern when drizzled. It looks like light pudding. There are different levels of trace for different techniques.
Can I use natural colorants in my soap?
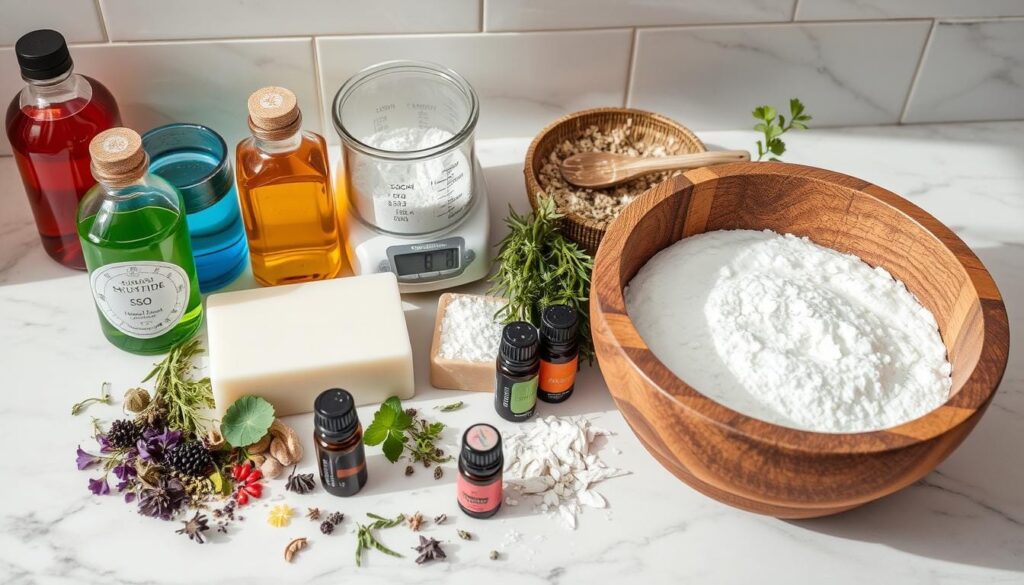
Yes! Use clays, herbs, spices, and plant-based powders for colors. Spirulina for green, turmeric for yellow, and activated charcoal for black. Add them carefully to keep the soap’s quality.
How long will homemade soap last?
Homemade soap lasts 1-2 years if stored right. Keep it in a cool, dry place, away from sunlight and humidity. The shelf life depends on the oils and ingredients used.
Is cold process soap better than store-bought soap?
Homemade cold process soap often has more natural ingredients and glycerin. You control the ingredients and avoid harsh chemicals. It’s better for your skin.
How difficult is soap making for beginners?
Soap making is doable for beginners. It needs attention to detail and safety. Start simple, follow instructions, and practice. Each batch helps you get better.