How to Pack and Store Homemade Candles-2025
Do you know what the most underrated part of candle making is? It’s something people often overlook how to pack and store homemade candles.
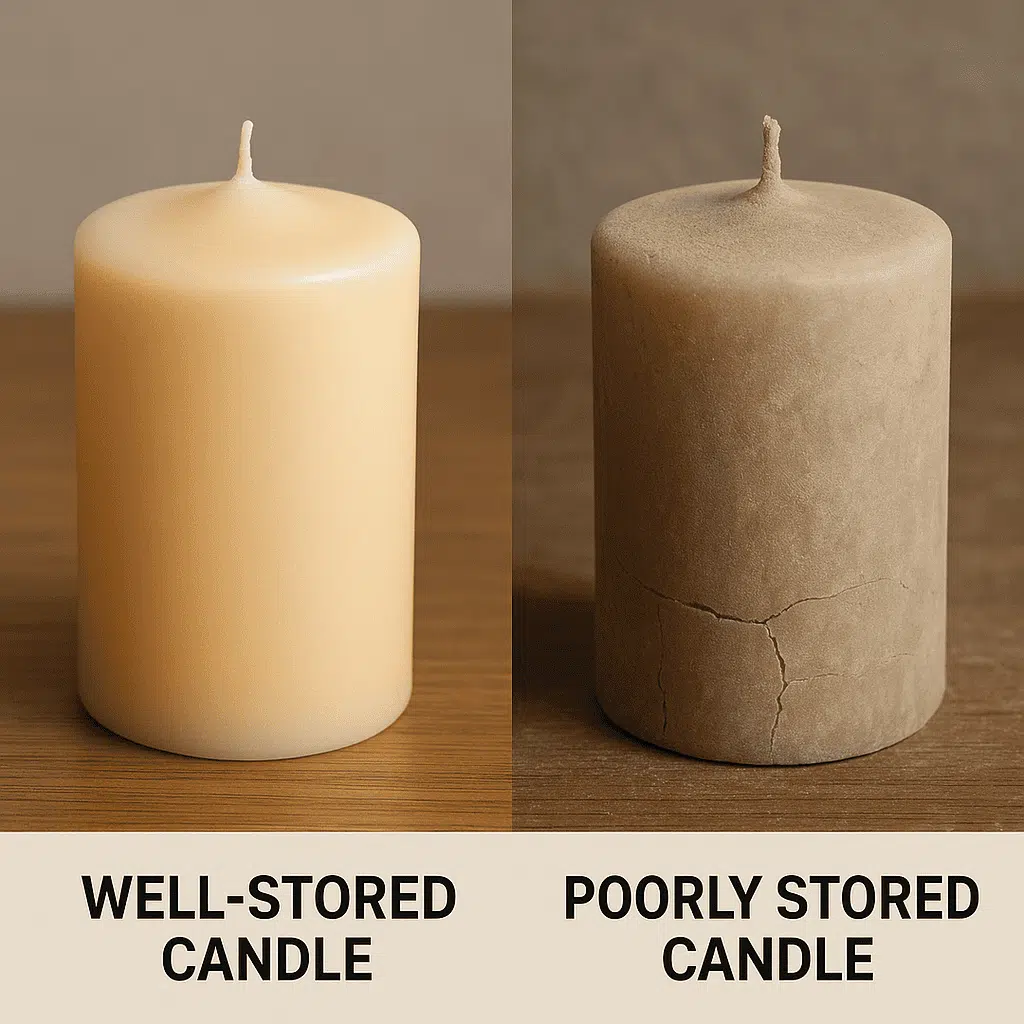
Why does it matter so much? Because even the best-made candle can lose its charm if it’s not packed or stored right.
Improper storage can lead to faded colors, weak scent, cracked wax, or even a dusty surface that nobody wants to light.
And if you are gifting or selling your candles, first impressions count—neatly packed candles feel more special and show that extra care went into them.
So, taking a little time to store them properly? Totally worth it.
In this post, I am going to guide you on how to pack and Store Homemade correctly.
What Happens If You Don’t Store or Wrap Your Candles Properly?
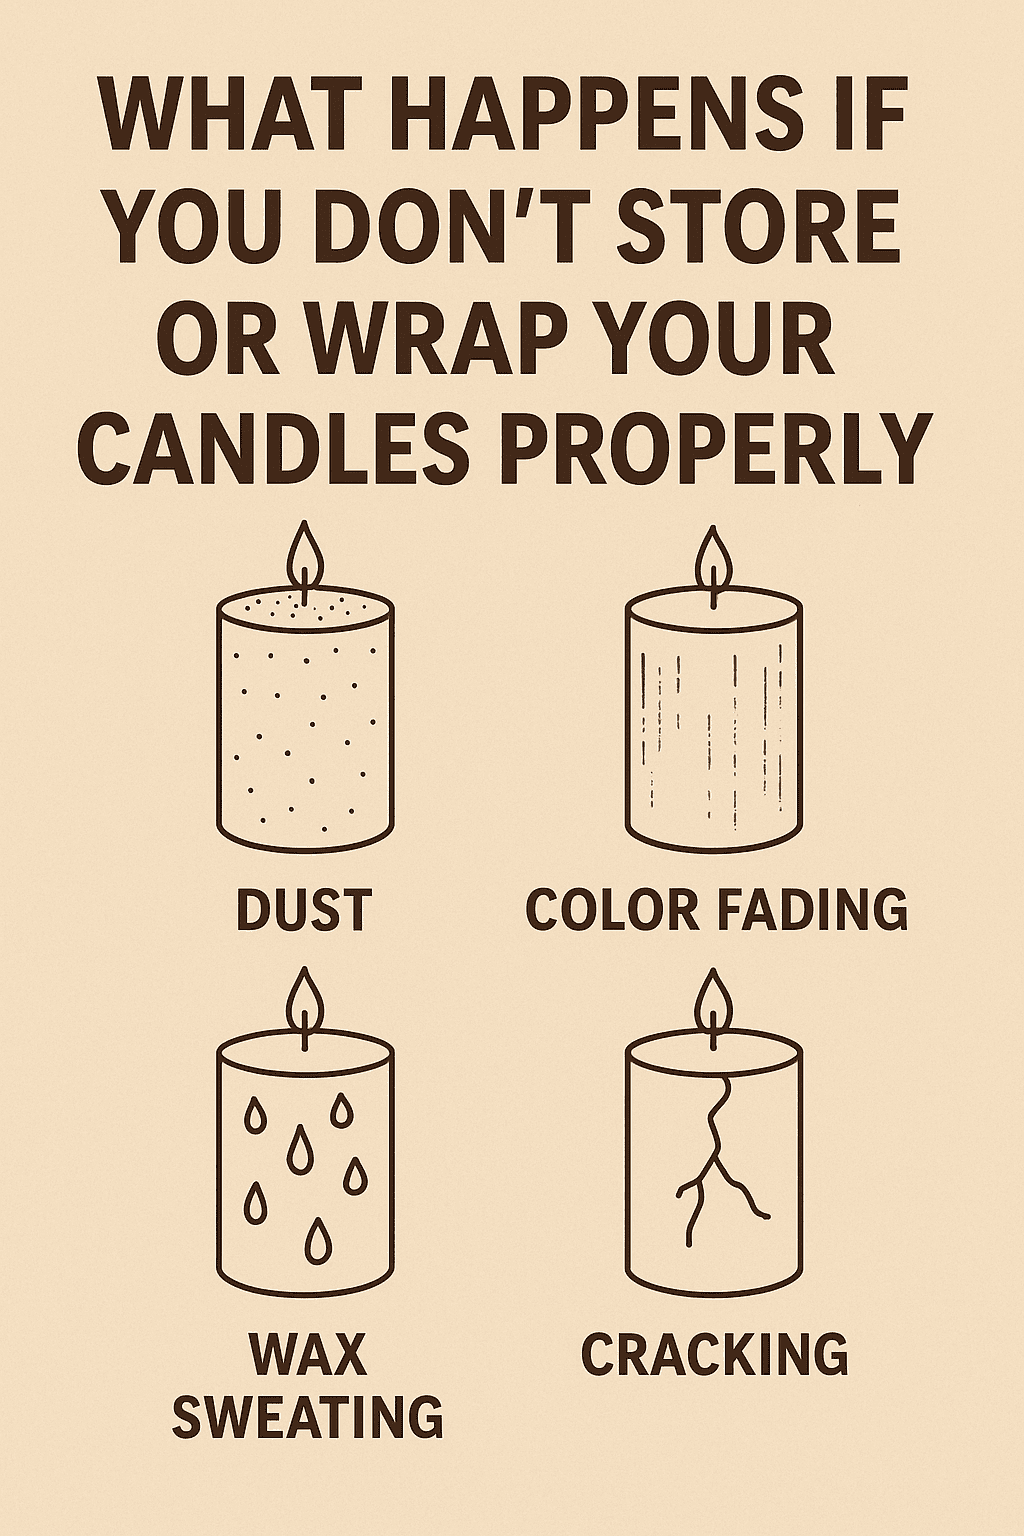
Here is what can happen if you don’t store your homemade candle properly:
Fragrance loss—essential oils can evaporate or break down over time, leaving your candle scentless.
Wax sweating is another issue, especially with soy or coconut wax, and it can make your candles look greasy or feel sticky.
Then there is dust—nobody wants to light a candle that has dirt stuck on it.
You might also notice frosting or cracking if the wax gets too cold or overheated, which is not only responsible for how it looks, but also how it burns.
And let’s not forget color fading—UV exposure can bleach out your beautiful tints, making your once-vibrant candles look tired and dull. (and trust me, that looks depressing)
The worst part? All that time and effort you put into making them is gone to waste.
So trust me, learning how to store and pack them properly is beneficial.
Tip #1: Let Them Cure First
This was the first mistake I made. I didn’t know candles need time to cure, which basically means letting the wax and fragrance fully bind together before burning.
Curing allows the scent molecules to mix evenly with the wax, so when you light the candle, you get a stronger and more consistent scent throw.
Without this step, even the most beautiful candle can smell weak or it will smell off.
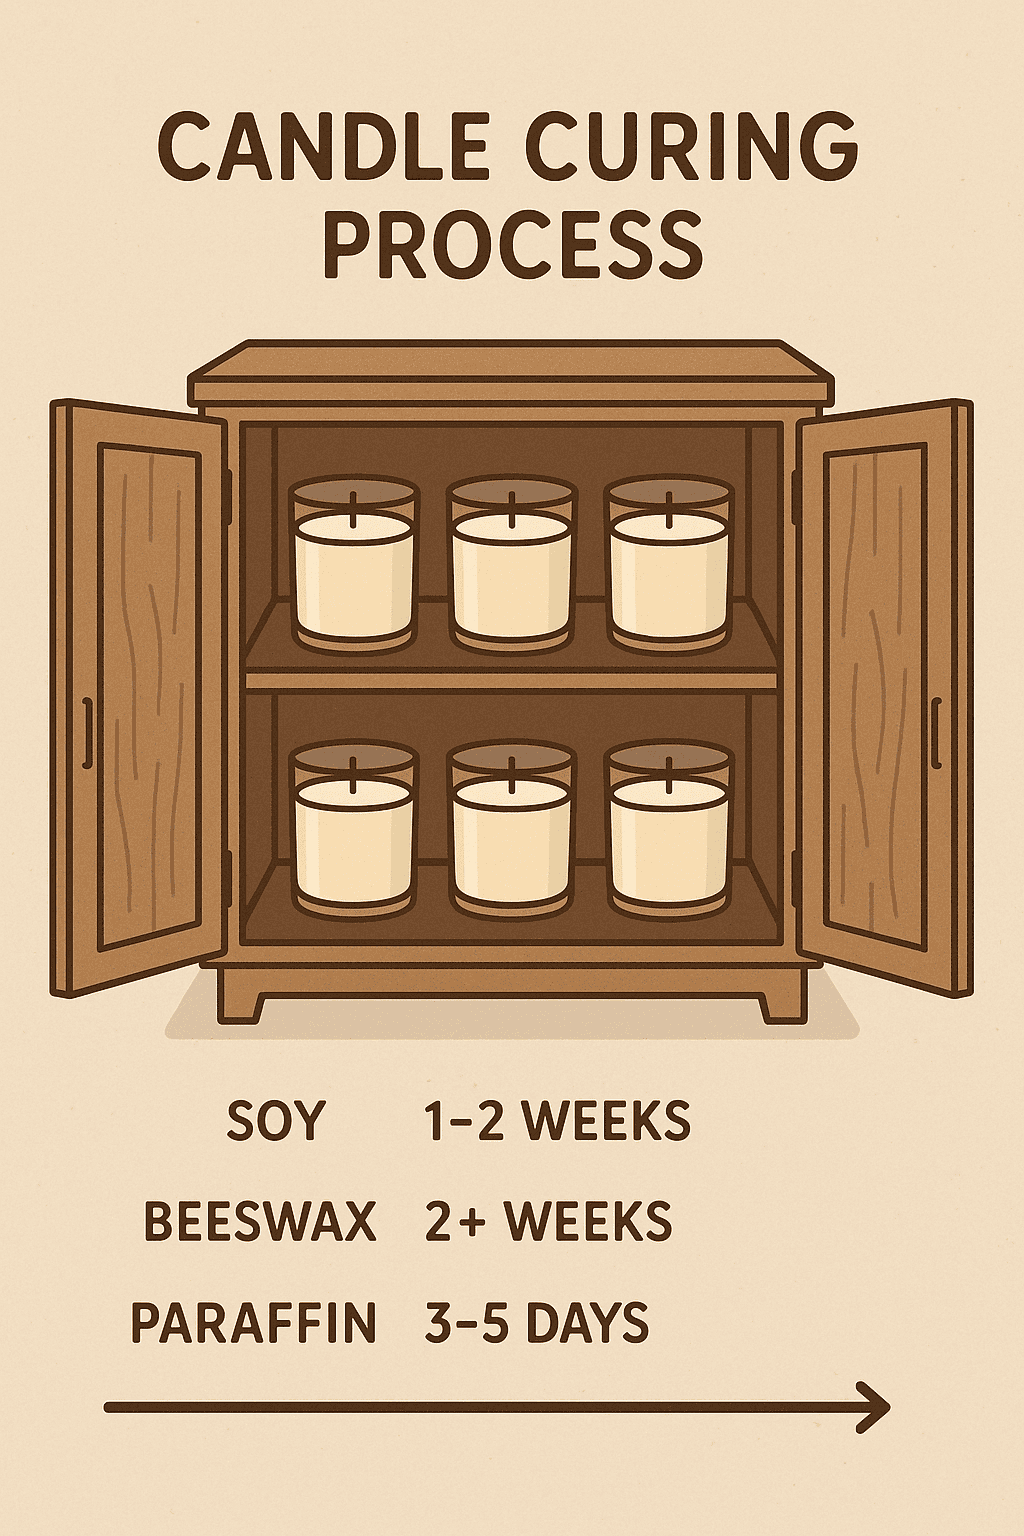
What you need to do is to let your candles cure for at least 48 hours if you are using paraffin wax, anywhere from 7 to 14 days for soy wax, and about 5 to 10 days for beeswax.
Each type of wax needs its own time to fully set and lock in the fragrance, so don’t rush the process—your nose will thank you later!
Trust me, this makes a huge difference in how well your candle smells. You just need to place your homemade candles in a cool, dry cabinet (away from food smells!) while they cure.
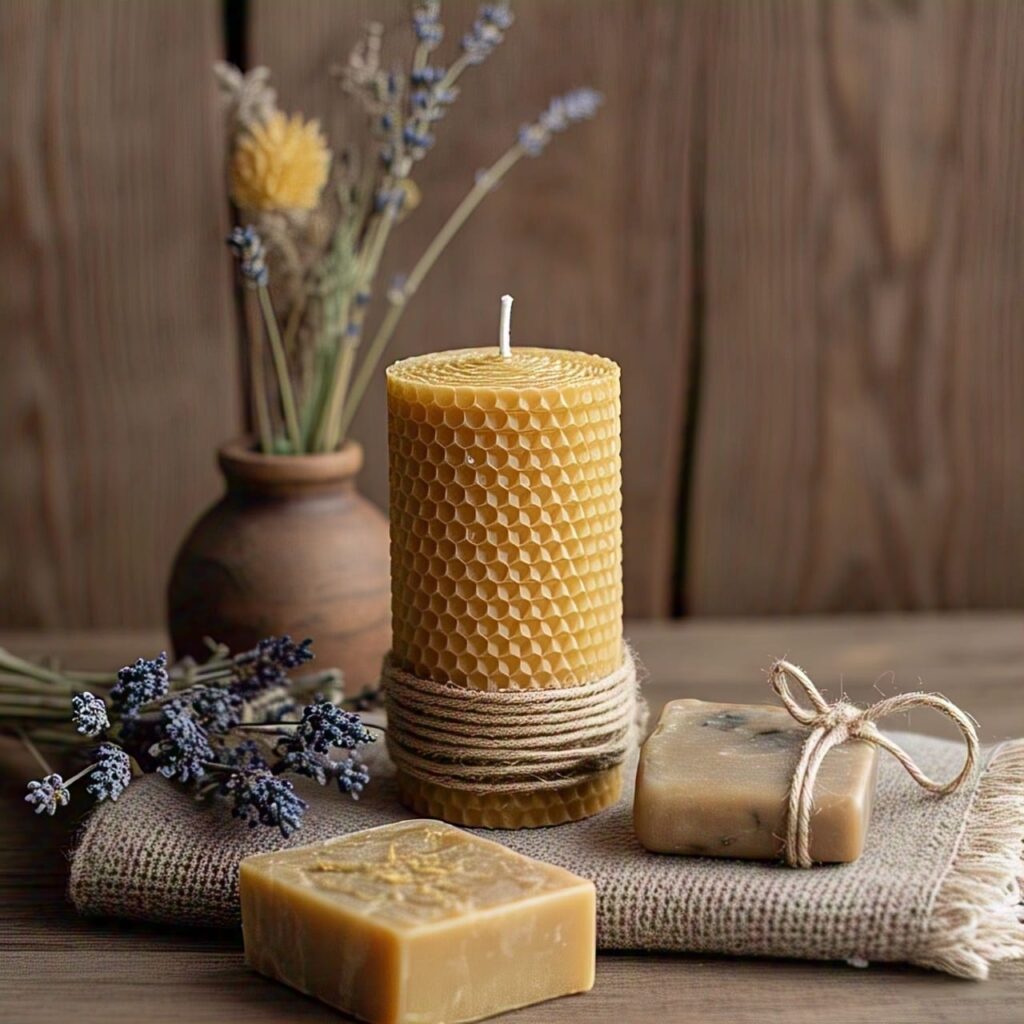
I personally love using beeswax for its clean burn and natural scent. It’s one of the best waxes out there! I talk more about it in my post on the Benefits of Beeswax Candles.
Tip #2: Wrap the Candle In the Correct Way
Here is where things got fancy. I started experimenting with different ways to pack homemade candles, especially since I began gifting them to friends and even selling them.
Wrapping candles is not only about presentation but also about protection. Below, I have a guide on how to wrap homemade candles correctly
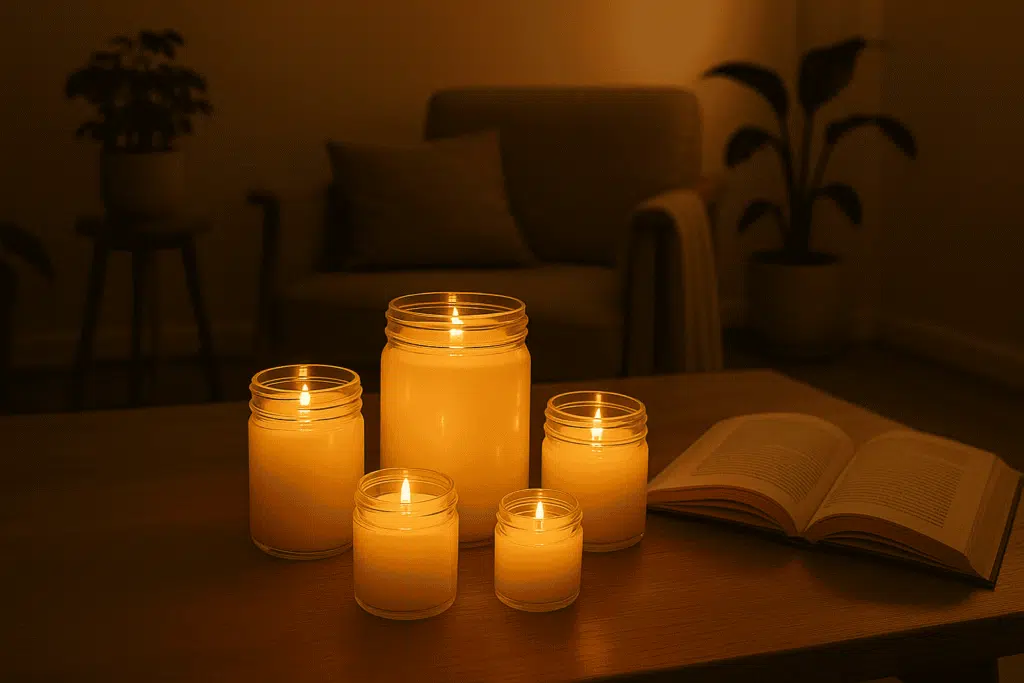
For Container Candles:
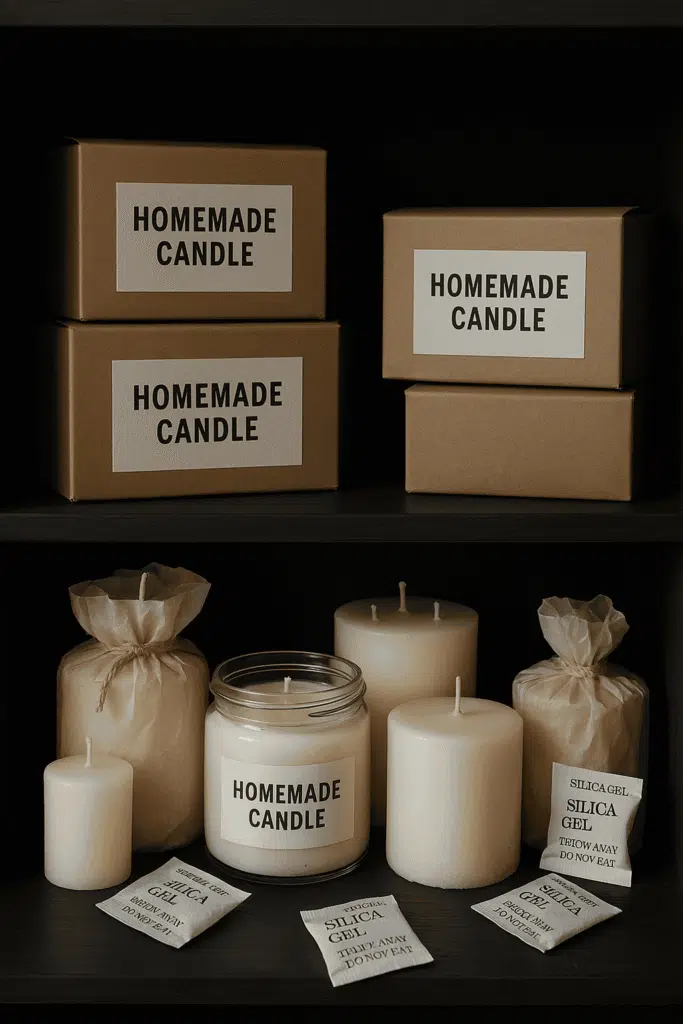
Lid or dust cover – If your candle jars come with lids, always use them. If not, you can cover the top with a piece of parchment paper and tie it with some twine. It keeps out dust and looks cute, too.
Wrap in tissue paper – This makes your candle look more special and also helps protect it from getting scratched. I like using soft, colored tissue paper to make it feel extra nice.
Use strong boxes – If you’re mailing your candles or giving them away, pack them in strong cardboard boxes. Boxes with dividers are even better—they keep each candle in place and stop them from bumping into each other.
For Pillar or Taper Candles:
Wrap in wax paper or parchment – Avoid using plastic wrap because it can trap moisture. Wax paper or parchment is better since it lets the candles breathe and keeps them clean.
Use bubble wrap when mailing – This helps protect the candles from breaking or getting dents while they are being shipped.
Label them – This is super useful, especially if you have different scents or use different types of wax. It keeps things organized and makes gifting easier.
I now have a whole drawer just for packing—filled with kraft boxes, natural twine, and my own handmade labels. It’s like my little candle-packing corner, and yes, it’s just as cute and satisfying as it sounds.
Tip #3: Keep Them Cool (But Not Freezing)
One lesson I learned the hard way? Never store candles near heat or in direct sunlight. I once kept two lovely beeswax candles on a shelf above the radiator, thinking it was fine—and they ended up soft, melted, and barely smelled like anything.
The best temperature for storing candles is between 60°F and 80°F (15°C–27°C). So, avoid keeping them in places like the attic or basement, which can get way too hot or cold.
Don’t put them in windows either—sunlight can fade the colors and weaken the scent. And definitely keep them away from appliances that give off heat.
Now, I keep all my candles in a cool, dark closet that has good airflow. I even added a few silica gel packets to my storage boxes to help keep out any extra moisture. It’s a small step, but it really makes a big difference!
Tip #4: Store Upright and Keep the Wicks Trimmed
It might sound like a small thing, but how you store your candles really matters. Always keep them standing upright, especially taper and container candles.
Laying them down can cause dents in the wax or make the wick bend, which isn’t great for burning later.

Also, don’t forget to trim the wick to about ¼ inch before packing or storing. If the wick is too long, it can bend, snap, or just be tricky to light later on.
Sometimes, I even use a little round piece of cardboard with a hole in the middle (like a mini wick guard) to keep the wick straight and safe. It’s a simple trick that helps a lot!
Tip #5: Don’t Store Near Strong Smells
One time, I mistakenly stored some of my lavender candles right next to a container of potpourri.
Big regret, the candles soaked up the mix of scents, and let’s just say lavender and spicy cinnamon don’t smell great together.
Candles, especially ones made with soy or coconut wax, are pretty porous. That means they can easily absorb smells from whatever ever around them.
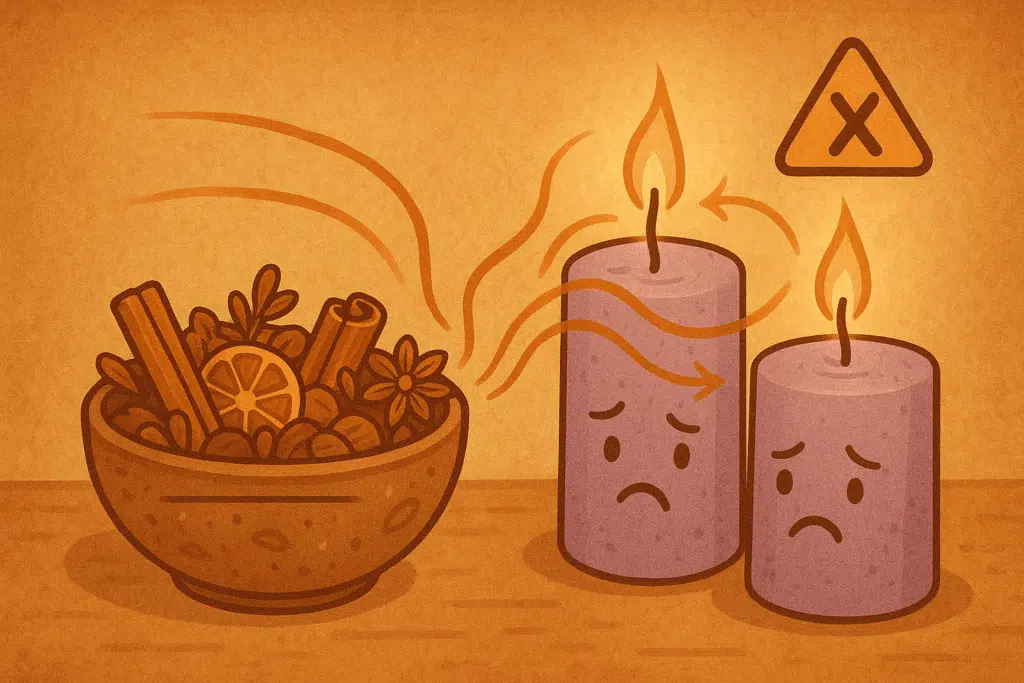
So it is best not to store them near strong scents like cleaning supplies, spices, or perfumes.
If you are planning to keep your candles for a while, use airtight containers to protect them.
Even better? Store each scent in its own separate box to keep the fragrance pure and fresh.
Bonus Tip: Label Everything
This tip came from a fellow candle maker I met at a craft fair, and it completely changed how I organize my candles.
She told me to always label each candle with the date it was made, the scent, and the type of wax I used. It sounded simple, but it made a big difference.
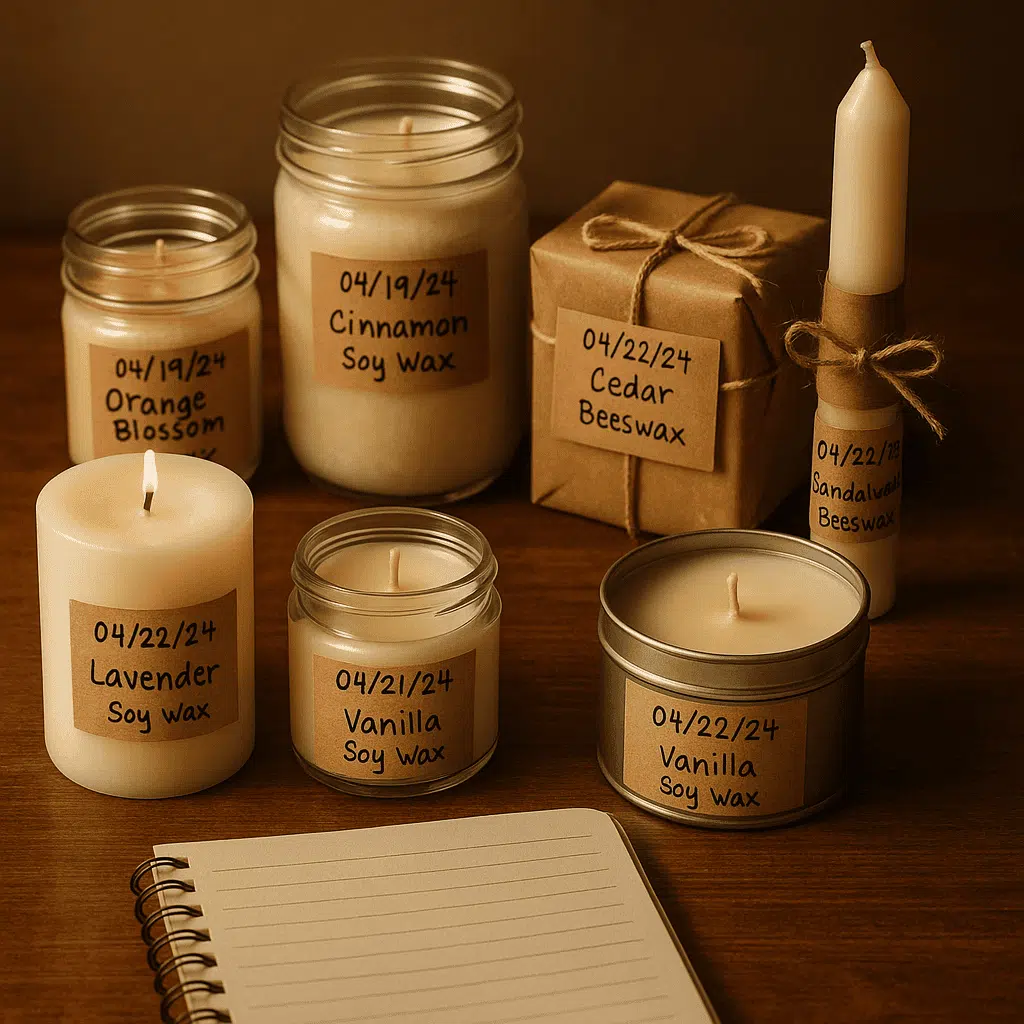
Now I can easily tell when a candle was made, whether it’s still within the best use window (usually 6 to 12 months for a good scent throw), and what kind of burn to expect.
I’ve started adding cute handwritten labels to every candle I make—not only is it super helpful, but it also adds a nice personal touch when I’m gifting or selling them.
Final Thoughts: Why This Matters So Much
Learning how to pack and store homemade candles changed everything for me. I no longer worry about them going bad, losing their lovely scent, or getting damaged before I can gift them or send them out to customers.
Storing candles the right way means they’ll smell stronger when you burn them, look clean and fresh, last longer on the shelf, and bring more joy to anyone who receives them.
And let’s be real—if you’re putting time, care, and creativity into making your candles, they deserve that same level of care afterward, too.
So, whether you’re just starting out or you’ve been making candles for years, take it from me: proper packing and storage might just be the magic touch your candles need to truly shine.
FAQ
1. How do you store homemade candles to keep them fresh?
To keep homemade candles fresh, store them in a cool, dark place away from direct sunlight, heat sources, and strong odors. Use airtight containers or wrap them in wax paper and place them in sturdy boxes. This helps maintain fragrance, color, and overall candle quality.
2. Can you store homemade candles in plastic containers?
It is best to avoid plastic containers for long-term candle storage, as they can trap moisture and affect the wax. Instead, use breathable materials like cardboard boxes or parchment paper for wrapping, especially if you are packing soy or beeswax candles.
3. Do homemade candles expire or go bad?
Yes, homemade candles can lose their scent and appearance over time. Most candles are best used within 6 to 12 months for optimal fragrance throw and burn performance. Proper storage slows down scent loss and wax deterioration.
4. Why is curing important before storing homemade candles?
Curing allows the wax and fragrance oils to bind properly, which strengthens the scent and improves the burn. For best results, cure soy wax candles for 7–14 days, paraffin wax for at least 48 hours, and beeswax candles for about a week before packing or using.
5. How should I pack candles for shipping safely?
When packing homemade candles for shipping, wrap each candle in tissue or wax paper, use bubble wrap for extra protection, and place them in a snug cardboard box with dividers. Label each candle with its scent and wax type to keep things organized and professional.
6. What temperature is best for storing homemade candles?
Store candles between 60°F and 80°F (15°C–27°C). Avoid places like attics, basements, or areas near windows and appliances. Fluctuating temperatures can cause sweating, frosting, or scent fading in soy and coconut wax candles.
7. Can I store different scented candles together?
It’s not recommended to store different scented candles together, especially in open containers. Candles are porous and can absorb nearby scents. Use individual boxes or airtight containers to preserve the original fragrance of each candle.